Restoration Process
EVALUATION
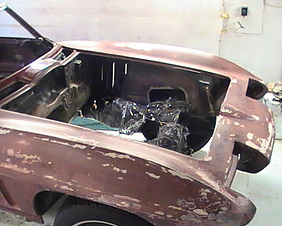
Klear Kustoms can bring any vehicle back to its former glory; but in some cases this might not be practical, or it may involve one or two donor vehicles purchased only for parts. So before any restoration work starts; candidates get a thorough evaluation of mechanical and physical condition. What we call a (Vehicle Inspection Package).
DISASSEMBLY
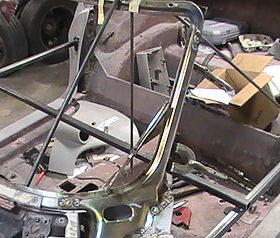
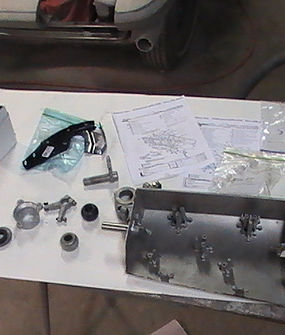
After receiving the green light from the client, to begin the restoration, we divide the vehicle four sections: Front End, Interior Section, Rear End and Undercarriage. What this means is that all the parts will be carefully disassembled tagged, bagged and or labeled and stored in boxes belonging in its respective sections for future ease of identification. As we disassemble a vehicle pictures are taken through out the process to be used as reference to create a more efficient restoration. We believe in being proactive this will make for an efficient and fast worry free restoration.
DIAGNOSIS
After Disassembly is completed we then decide on the best process to remove rust by way of acid dipping, soda blasting or a combination of the two this way we ensure we are removing paint, body filler and that pesky thing called rust. Next the body is attached to the rotisserie or a frame jig to examine the extent of decay due to corrosion the areas that require special attention can be mapped out and a repair plan can be established.We will then spray a Etching Primer Chromate free a two component, primer with corrosion resistance and excellent adhesion for direct-to-metal applications. This primer is intended for use as a metal treatment under Glasorit primer surfacers. This product can be applied over cleaned aluminum, galvanized steel, and stainless steel, or over a properly sanded or blasted carbon steel, sanded fiberglass and sanded OEM e-coat primers. As explained on the Glasorit’s paint manuals. With the vehicle attached to the rotisserie suspended at comfortable working height, it allows us to be able to rotate the vehicle spray the primer and reach into areas that under normal conditions we would not be able to get to; or would be but with a greater level of difficulty. The reason we spray the body with epoxy primer is to add corrosion protection and adhesion to other products.
RUST REPAIR
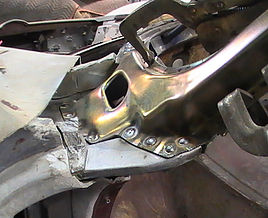
After the Epoxy has fully cured we proceed to start working on the metal so going back to our earlier established plan, we will either replace if not available we will fabricate replacement panels. These panels will be cut and welded at the factory seams and sprayed with weld through primer. This process is much easier to accomplish with the vehicle still mounted on the rotisserie with all the mechanicals removed. We have equipped ourselves with certain tools that enable us to reproduce nearly any panel we need to replace such as an English Wheel, Shot Bag, Bead Roller, Metal Brake and other specialized metal equipment.
RUST PREVENTION
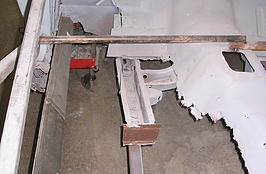
Every step we take is to remove rust and prevent rust to from reappearing as you know rust does not stop. As soon as oxygen and moisture come in contact with bare metals corrosion will begin and the job is ruined. To prevent rust from reappearing we cut open any boxed area on the body i.e. rocker panels, that we cant get at and then we remove the rust so the proper measures will be applied.
SEAM SEALING
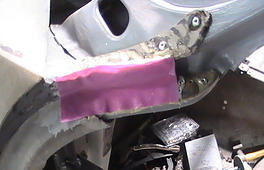
After all the welding is complete we use Urethane base seam sealer; what this product does is offer corrosion protection by preventing moisture from creping back into the welded areas.

WATERPROOFING
What we mean by waterproofing is that we will always use a layer of fiberglass on the welded areas of the vehicle, the benefit of this is that fiberglass is not moisture absorbent as bodyfiller also the fiberglasss strength is much greater then body filler
FILLING
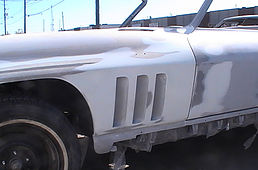
We will use a sprayable polyester putty to fill imperfections on the body of 1/8th or less after hammer on or off dolly, stretching or shrinking. This allows us to obtain a perfect smooth surface.

PRIMING
Right after media blasting we will use a vinyl wash product, this product acts as an etching agent providing adhesion for the epoxy primer which is also an etching primer, the reason for this is to prevent rust from appearing, while work on the vehicle continues. After all the metal and body work is complete we will spray on 2-3 coats of primer surfacer which will then be block sanded. Once prepping is complete we are now ready to begin paint work but before your top coat is on the vehicle one more coat of primer sealer will be applied to provide excellent flow and leveling leaving us with an excellent foundation for the top coat to follow.
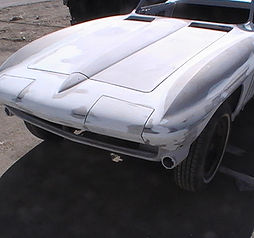
FITTING
One other very important step of your restoration is the pre-fitting of all the parts we have to assemble on the vehicle to check gaps and make sure everything is working in a practical manner. This is also the stage where all the chrome parts are sent out for plating and all suspension components are either rebuilt and painted or replaced new.

CLEANING
So simple yet one of the most important parts of the restoration process, before paint is applied this step entitles a thorough cleaning to remove sand, dust particles or any other foreign impurities that might have found their way onto the vehicle. To accomplish this we blow the vehicle with dried and filtered compressed air and vacuum many times over, before the body is washed with a pre cleaner. Suspension and undercarriage: Suspension parts are taken apart to be cleaned and painted, powder coated or plated depending on the application. Parts that are not to be replaced will be sandblasted in a proper cabinet primed painted or plated depending on what the requirements maybe. Once we receive the suspension parts that were sent out for plating or powder coat, we assemble the suspension to the frame with grade 8 hardware for added strength or use Stainless Steel hardware either way is fine for looks and longevity.

PAINTING
What can we say about paint? Ohh Yeah, we have won award after award, we have several best of show awards in combination of paint work together with other companies that worked on different aspects of the build just as hard as we did on our paint work. We use 90 Line Waterborne Glasorit paint system by: BASF for restoration paint work, for custom paint; we use BASF’s Carazzisma Color line. The ease of spray that we found with between these two lines combined with their longevity and looks are second to none.

FINISHING
Every paint job is wet sanded and polished by doing this we ensure your paint to be free of any dust particles and also remove any orange peel, offering you a grand piano like finish and glass like look; vibrant and rich in color with an amazing depth.
